Nexigo was kind enough to send me a review sample of the Aurora Pro MKII for my very own website. Big shout out to Nexigo and helping me do something I have long wanted – have a site of my own for projector reviews.
The Aurora Pro MKII has gotten a lot of attention over the past year with some claims it can match JVC black level performance. This is an astonishing claim and something that immediately grabbed my attention. Black level performance is at the top of my own projector buying shopping list. Can a $3500 DLP UST projector with a rated 4000:1 contrast actually match JVC black levels? What if I said yes…
What’s in the Box
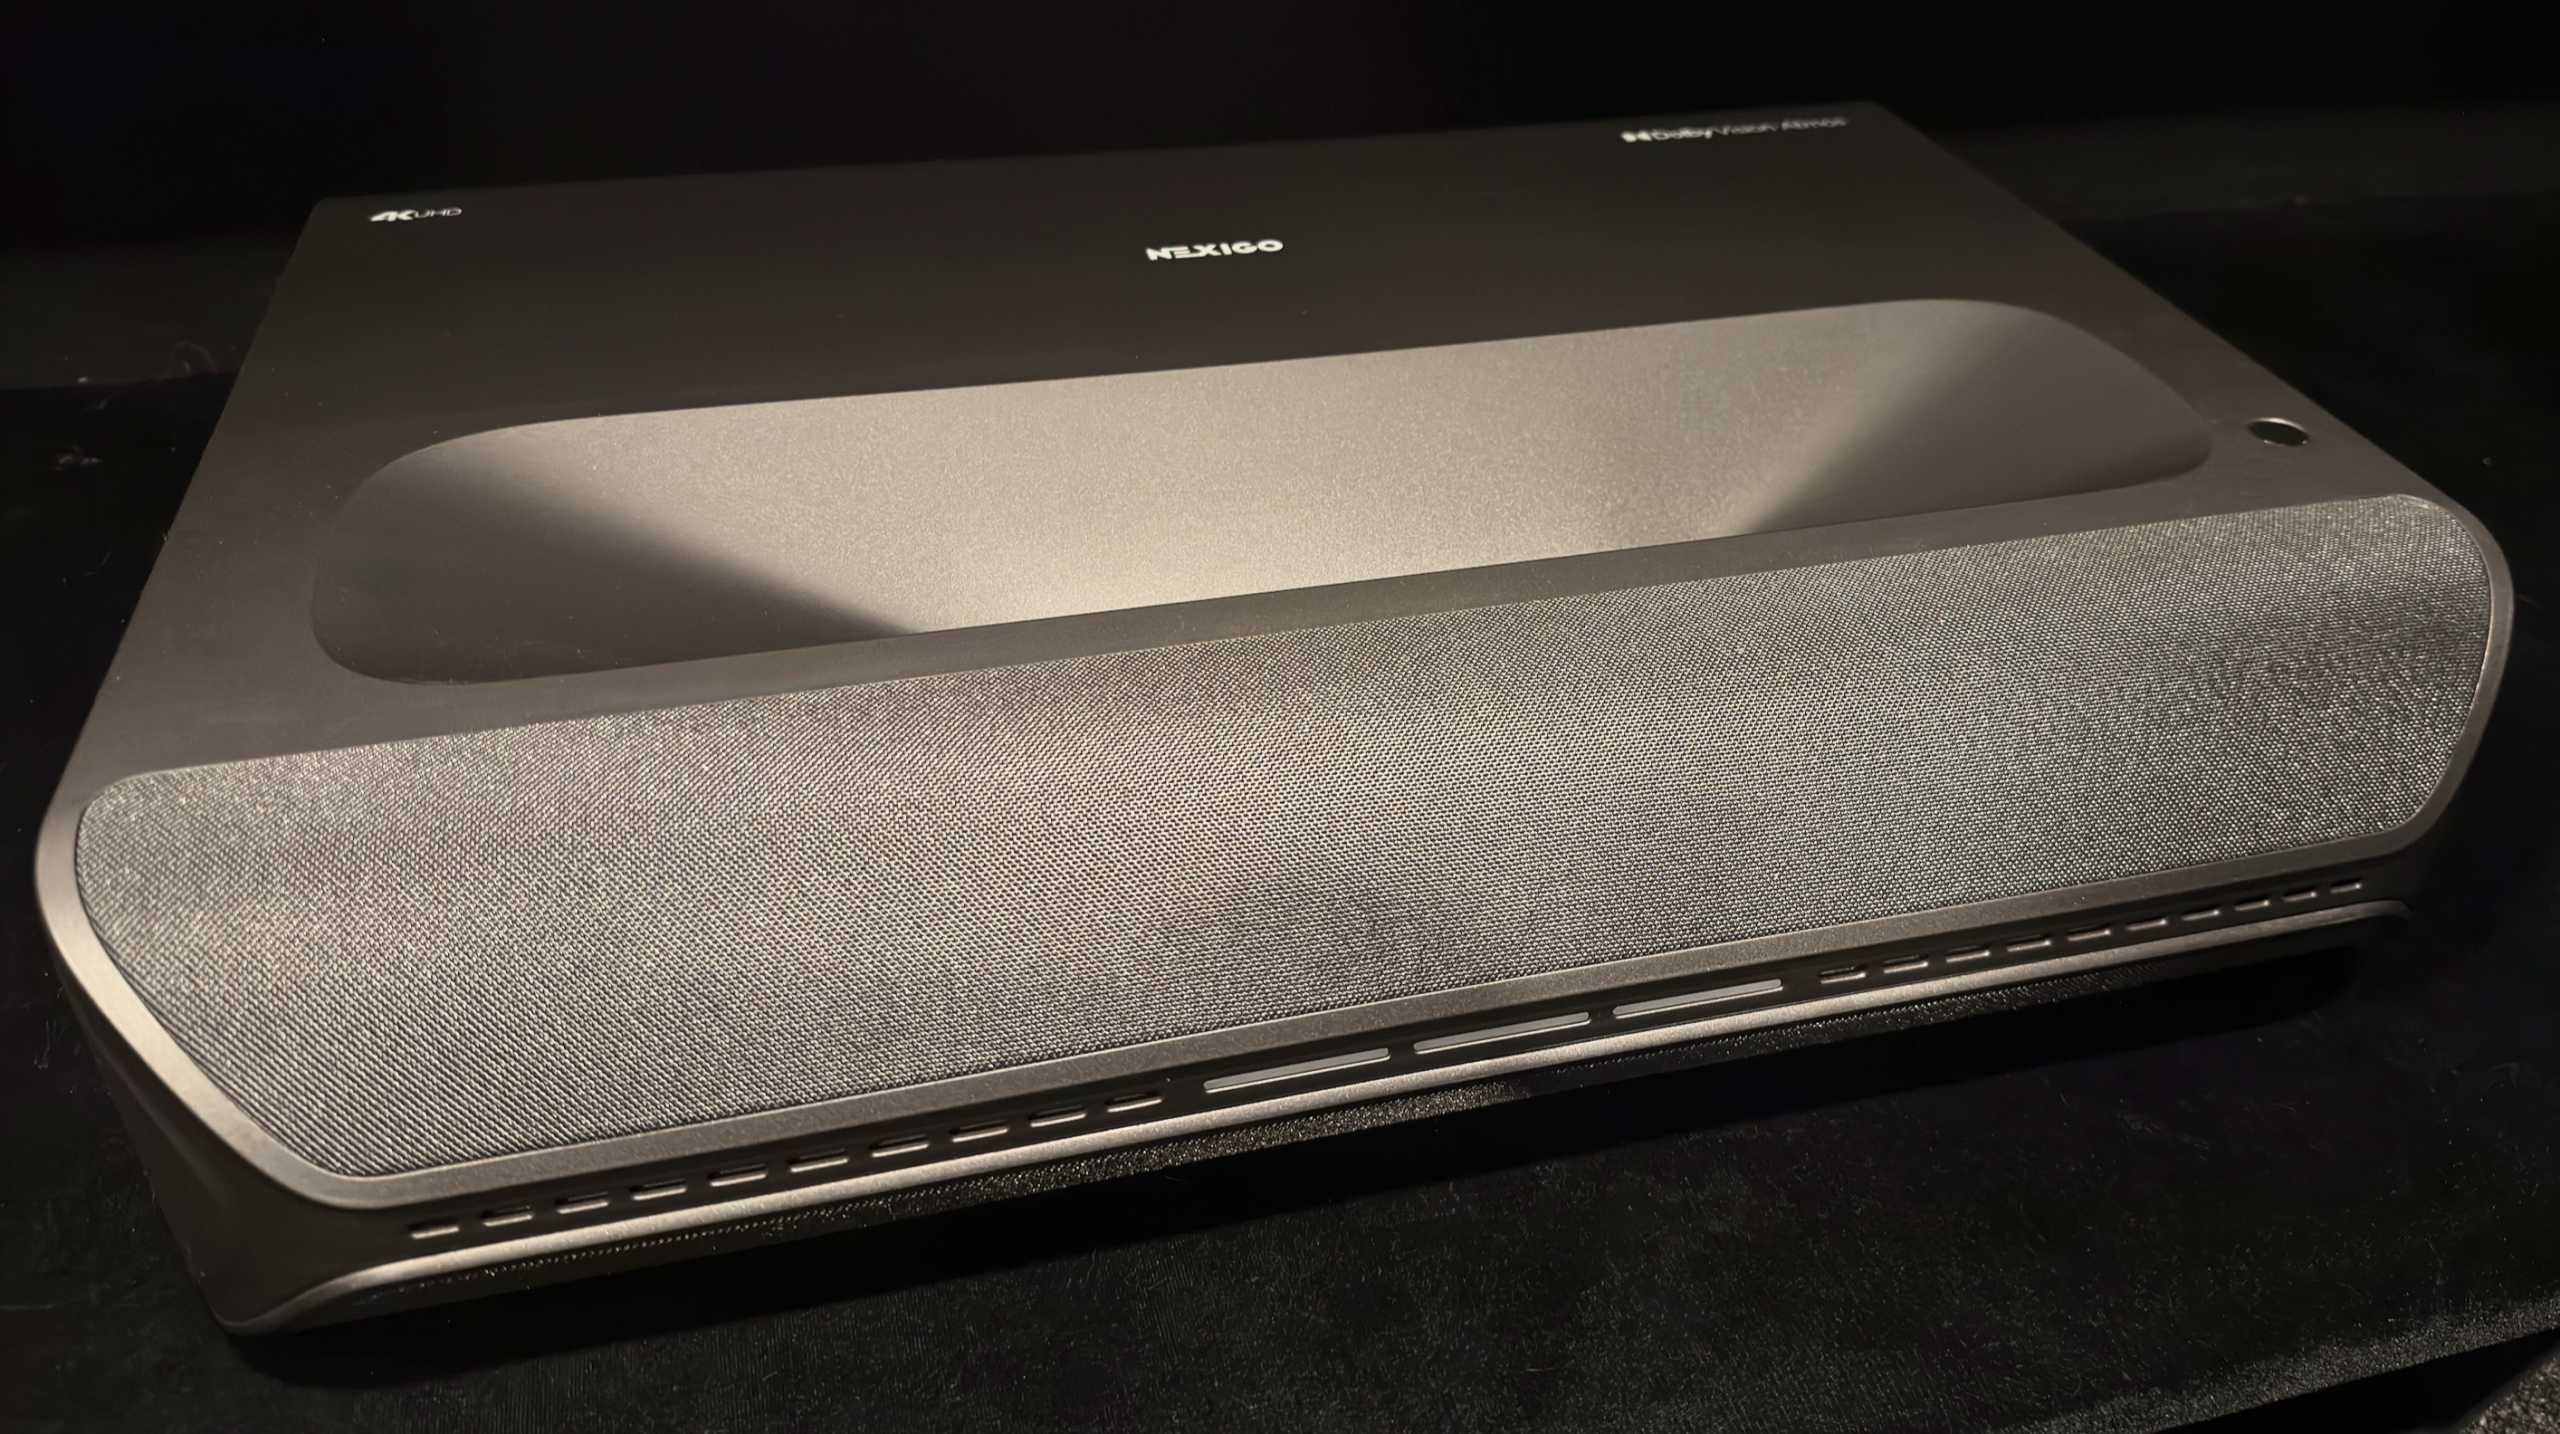
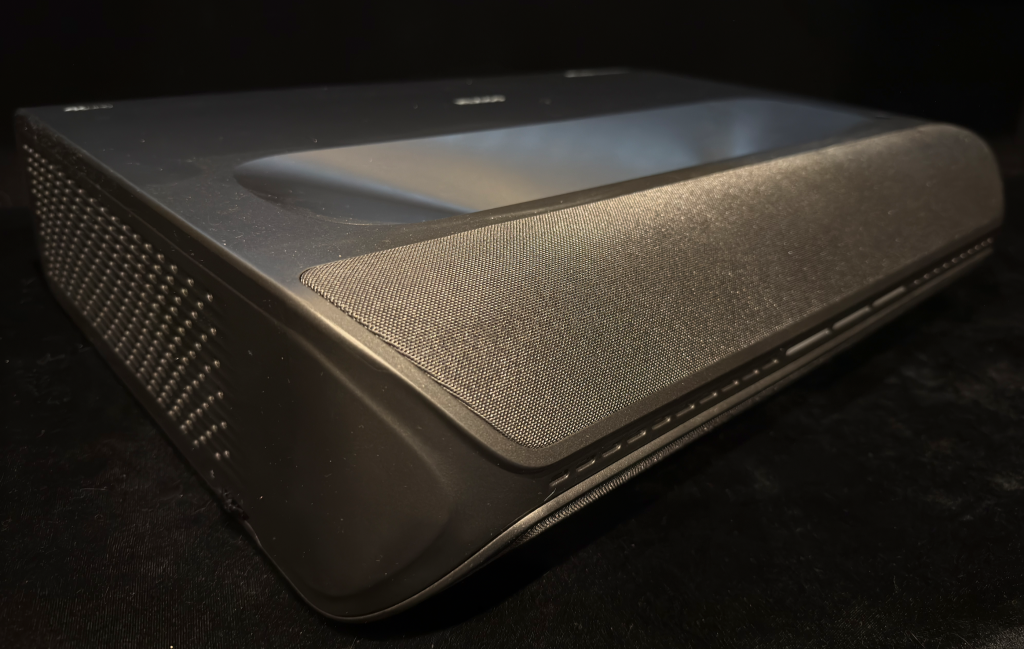
The Aurora Pro MKII, here forward referred to as the AP MKII, has a design identical to its predecessor. If you have the AP MKI and are looking for a sneaky upgrade that your partner may not notice, this’ll punch that ticket. For those unfamiliar, the design is reminiscent of a very large video game console with speakers. The angular front is interesting, and the status light LED bar bisecting two speaker grills has some nifty glowing effects as you turn it on and off. Overall, the build feels solid and thought out. There’s two easily adjustable feet in the front, and a fixed foot pad in the center back.
I personally would rather see a simple front panel design that would blend into more aesthetic environments. Next to a couple game consoles it’ll look great. On top of my stark white Ikea floating cabinetry? Not so much. But that’s ok, what matters most is the image it throws, and features it packs.
Features
The AP MKII is a bit of an odd-duck in the new projector world. It is loaded with features but is missing a fully fledged smart OS. It’s not completely dumb. You can do things such as Cast to it, browse files, connect bluetooth devices (both input and output), connect it to Alexa, and even browse the web! But, there are no built in streaming services. What this does mean is that there are no ads – I’d call that a feature!
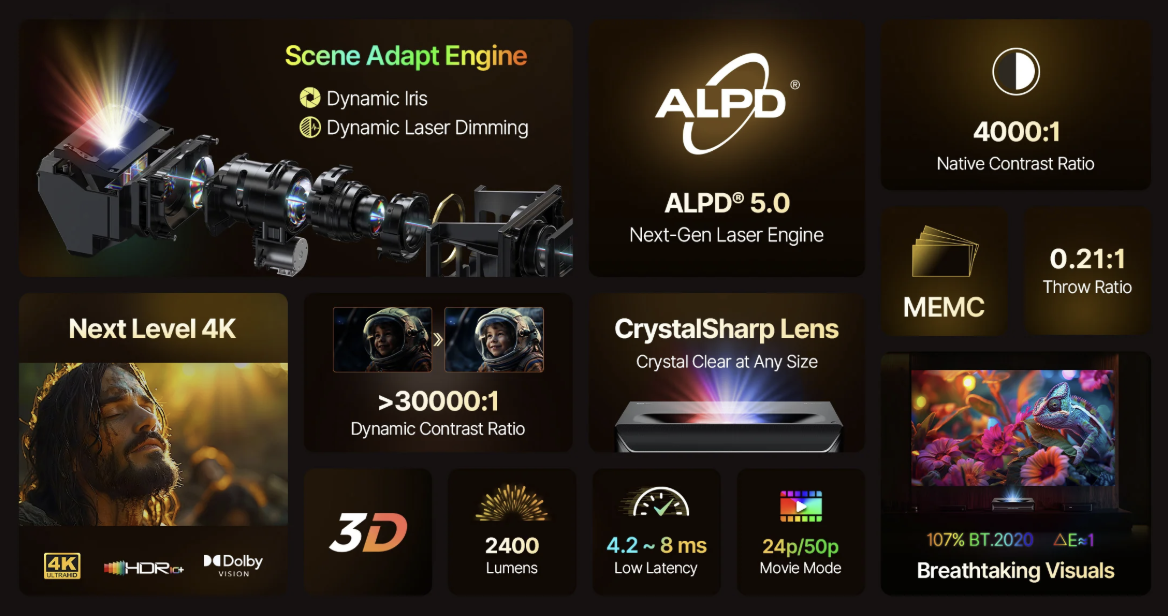
Aside from the lack of a smart OS, which some may consider a feature, the AP MKII is loaded with headliners: 2400 rated lumens, 3D support, HDR10+, and Dolby Vision. An ALPD 5.0 hybrid laser/LED system, provided by Appotronics, illuminates a quad-shifting 0.47” DLP DMD. It also features 24p movie mode, frame interpolation, low input lag, and over 100% BT.2020 color coverage. And one of the biggest and most unique features: a dynamic iris…on a laser projector! Oh, and a recent update added Dynamic Tone Mapping. Phew!
Another feature of owning the AP MKII that won’t be listed on a feature sheet is Nexigo’s support. They have been consistently shipping updates for this projector since they shipped it out to early reviewers and beta testers. They also have been very receptive to feedback and have implemented requested features, like a custom iris mode, and dynamic tone mapping. I’ve been very impressed with Nexigo’s support and care for their product. The early firmware on this projector was pretty rough around the edges and I wasn’t eager to write a review for it just to tear it apart. Since then, Nexigo has made big update after big update, really honing what this projector is capable of. Because of that, I truly hope Nexigo has continued success. Shipping good hardware is one thing, but what really separates a great product from the rest of the pack is support – both customer support, and continued improvement and refinement. Nice job, Nexigo.
Connections
Connectivity includes three HDMI 2.1 ports. All support CEC, HDMI 1 supports eARC, and HDMI 2 is recommended for gaming. The projector has three USB-A ports. Audio outputs are covered by a Line Out port and a dedicated S/PDIF digital audio output. For networking, it features an RJ45 Ethernet port, Wi-Fi 6, and Bluetooth 5.2. It also supports screen casting and includes a backlit remote operating in both IR and Bluetooth modes.
Setup and Focus
Oy. I look forward to the day when someone invents a mechanically automated setup built into an Ultra Short Throw projector. They are just not fun. Nexigo’s setup isn’t any harder or easier than the rest. You just have to be patient. The feet adjust smoothly without being overly stiff, or loose.
The MKII does have an 8-point keystone, image zoom, and image position adjustments, but that’s it for image manipulation. There are not any sort of image warp abilities to account for a wavy projection surface, like a wall or maybe an untensioned screen. Nexigo has clearly focused this projector for dedicated UST screen setups – they say as much right in the keystone adjustment screen.
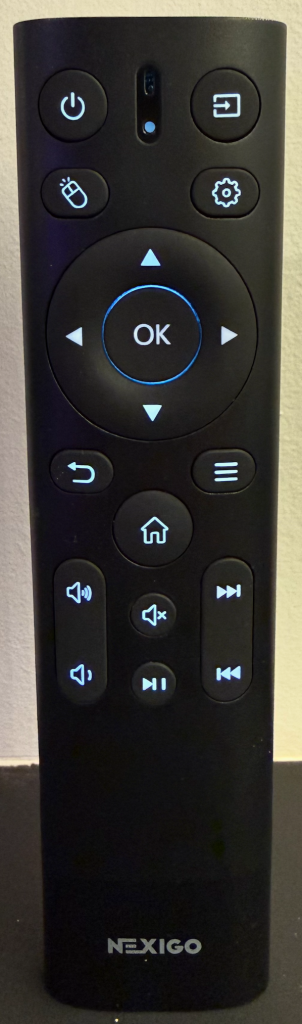
The included remote is nicely backlit and features solid, tactile buttons. It’s plain and unfancy, but effectively laid out. While it
can connect to the projector via Bluetooth for non-line-of-sight usage, a very convenient feature, you must always point the remote at the projector to turn it on.
The lens on my particular AP MKII is not the best I have seen but it is mostly uniform. I was not able to get the top of the image as sharp as the bottom. When watching content I never thought the image lacked sharpness. Lucy, a movie often used for clarity evaluation, looked crisp and detailed. It was only when I hooked up my computer to the AP MKII did I notice a softness to the image. PC text was not perfectly in focus and this persisted in some other on screen menus and UIs. I was expecting video games to also show this lack of detail, but once I started playing I pretty much forgot about the slight drop in clarity.

Noise Level
I found the noise level of the AP MKII to be pretty low and unobtrusive. The frequencies emitted by the fans and 4K shift mechanism on this projector are not of the annoying variety. SPL level isn’t everything as not all frequencies are treated equally by our ears. The AP MKII went mostly unnoticed in use. The exception is the Skin Tone Improvement setting. Enabling this did emit a slight high-pitched buzz that could be picked up. I mostly got used to it while enabled but the frequency emitted with this turned on could be bothersome to some people.
Living With It
The lack of a smart OS makes the AP MKII a pretty straightforward display use. You can set up the input to which you want the projector to default. This makes seeing the bright and giant home screen UI not come up. I turn the AP MKII on with the remote, grab my Apple TV remote and go about my watching. No fussing with menus to get to what I want. And, with that combo, no ads.
I do find the menu structure of the AP MKII to be pretty cumbersome and unorganized. The main settings menu is littered with controls that seemingly could be better sorted. A main Picture menu with all related picture controls would be welcome. Then a Signal or System menu could capture a handful of other controls. The menus are just a lot to flip through every time you want to adjust something.
There is the ability to set shortcuts on the remote to specific settings. This is handy but I did find myself wanting to save them to more settings. Specifically, it is possible to save the gear button to the SAE menu (dynamic contrast), but only to one of the two SAE options. I’ll get into those options later and why this wasn’t as helpful as it could be.
Picture Quality
Calibration
First, a technical note on calibrating triple-laser projectors. Because RGB laser projectors use very narrow spectral primaries, two displays that both measure as D65 can still appear slightly different in white balance. This is due to observer metamerism, where small differences in human vision interact more strongly with narrow-band light sources than with traditional lamp or phosphor systems. For that reason, I do not rely solely on numerical targets. Instead, I perceptually match the projector’s white balance to a trusted reference display with a known white point and then verify with measurements. It is also worth noting that individual vision varies, so the exact perceptual match I arrive at may look slightly different if another person performed the same alignment.
From a measurement standpoint, while higher-resolution spectroradiometers are theoretically better suited to laser light sources, an i1Pro2 used with ArgyllCMS in its HiRes sampling mode is generally accurate enough for practical calibration. Any remaining measurement error tends to appear in the most saturated colors, where calibration adjustments are intentionally minimal and have limited impact on real content. In practice, this approach produces results that are visually consistent and close to what higher-end instruments would achieve, while remaining realistic for a review workflow.
SDR Calibration
I found calibrating the Nexigo Aurora Pro MKII to be a rather frustrating experience. Multiple controls impacted the image in ways that were unexpected or uncommonly extreme. Gamma and EOTF options gave me pause as gamma is a type EOTF (Electro-Optical Transfer Function) – how can there be gamma and EOTF? The Gamma control impacted the 100IRE white balance which is very uncommon, in my experience. The Brightness control had large adjustments which I’d like to see be more granular, it also impacted all the way up to 100IRE which was a surprise. Contrast didn’t just adjust clipping, but it also had an impact on white balance. Then there was also the Scene Adapt Engine (SAE) and its influence on white balancing; when engaged, it caused a significant red color dropout (about 7% relative to blue and green), necessitating a recalibration that reduced available light by 18% for the same accuracy at 100IRE. I’d really like to see Nexigo clean up the controls here and make it so SAE, Gamma, and Contrast do not have an impact on the white balance.
Despite the control complexity, a respectable greyscale was achieved for SDR content after some effort. The final calibrated settings resulted in a light output of only a 4% drop in output with a dE of 2.6, compared to a near-perfect 100 nits and 0.2 dE with SAE disabled. While a slight compromise was made to brightness (leaving 100IRE a little lacking in red to preserve overall light), the final calibrated contrast level was recorded at 3300:1. The projector includes 11-point grayscale controls, which, although not strictly necessary to get the dE under 2, provided excellent fine-tuning capability.
Calibrating the Color Management System (CMS) proved to be the most challenging aspect. Adjustments to certain colors, particularly red, resulted in very large swings in saturation for single-number changes, which is contrary to most CMS controls these days. In the end, I was unable to fine tune the CMS as well as I was able to with the greyscale. A large color checker sweep left me with most colors under 3dE but some were approaching 6dE – largely the more saturated colors. The average was below 3dE. The Skin Tone Improvement setting did make a measurable impact to skin tones, by largely adjusting the yellow channel. Color errors in this range moved from perceptually noticeable (4-6dE) to unnoticeable (under 3dE) when the Skin Tone Improvement setting was enabled.
HDR Calibration
Tackling HDR calibration was made a bit easier after figuring out how the controls impacted the picture during SDR calibration. I started off with SAE turned on due to the red dropout, which isn’t usually a recommended practice. This allowed me to quickly tackle a good RGB balance throughout the greyscale range with the Gains and Offsets and some mild 11-pt Greyscale adjustments. After that I largely relied on watching content and adjusting the EOTF, Gamma, Dynamic Contrast, and Scene Adaptive Gamma settings to dial in the overall tonality of HDR. Modern projectors feature increasingly sophisticated processing. Because tone mapping nowadays is dynamically adjusted based on content, measurements do not tell you what you usually want to know. Combine that with how the dynamic contrast algorithms interact with the dynamic tone mapping and I usually find it best to just get color balance in line, the CMS wrangled, and then let watching a variety of content dictate my final settings.
The Nexigo Aurora Pro MKII did present some challenges with this method. After calibrating SDR, I knew that the Gamma control would impact the color balance of the image. This meant that after I settled on my preferred Gamma and EOTF settings I had to go back and fine tune the Gains for HDR. Not the end of the world but I don’t love knowing that any tweak to the Gamma, if I chose to based on the movie, will alter color balance.
Watching Content
Let’s jump right into what makes the Nexigo Aurora Pro MKII special…
Dynamic Contrast
I’ll come right out and say – no dynamic contrast algorithm is free. There has yet to be an algorithm that adds perceived contrast without visibly doing so, at least somewhat. With laser dimming, we are now starting to see some companies, like Nexigo, add in a dynamic iris to augment the laser dimming. It’s a smart and novel idea in which an iris can close to increase contrast but its slow movement, which has historically created visible artifacts, can be offset by the fast adjustments of a laser light source.
When Nexigo first released the AP MKII the laser dimming and iris movements were very noticeable. Over time, Nexigo has released many updates and the most recent 1.3.9 beta update I am currently testing has reduced a lot of these issues. What issues? Brightness jumps and flickering were the biggest one, but there have also been color shifts and a very odd banding behavior on smooth gradients. And, of course, highlight clipping. (Highlight clipping is where bright highlights will blend together and detail will be lost.) No aggressive dynamic contrast system is completely free of clipping. I’ve been impressed by Nexigo’s commitment to their product. Nearly every update has brought improvements to their dynamic contrast algorithm.
The AP MKII offers multiple dynamic contrast modes which they call their Scene Adapt Engine, or SAE. There are three main iris modes, Iris Bright and Iris Lite, and a Custom iris mode that offers 14 different settings. The custom modes only very minorly increase native contrast based on my measurements. These modes appear to be primarily for reducing the peak brightness, which in turn lowers the absolute black level. I measured that the lower you go on the custom iris mode, the lower the dynamic contrast you can achieve.
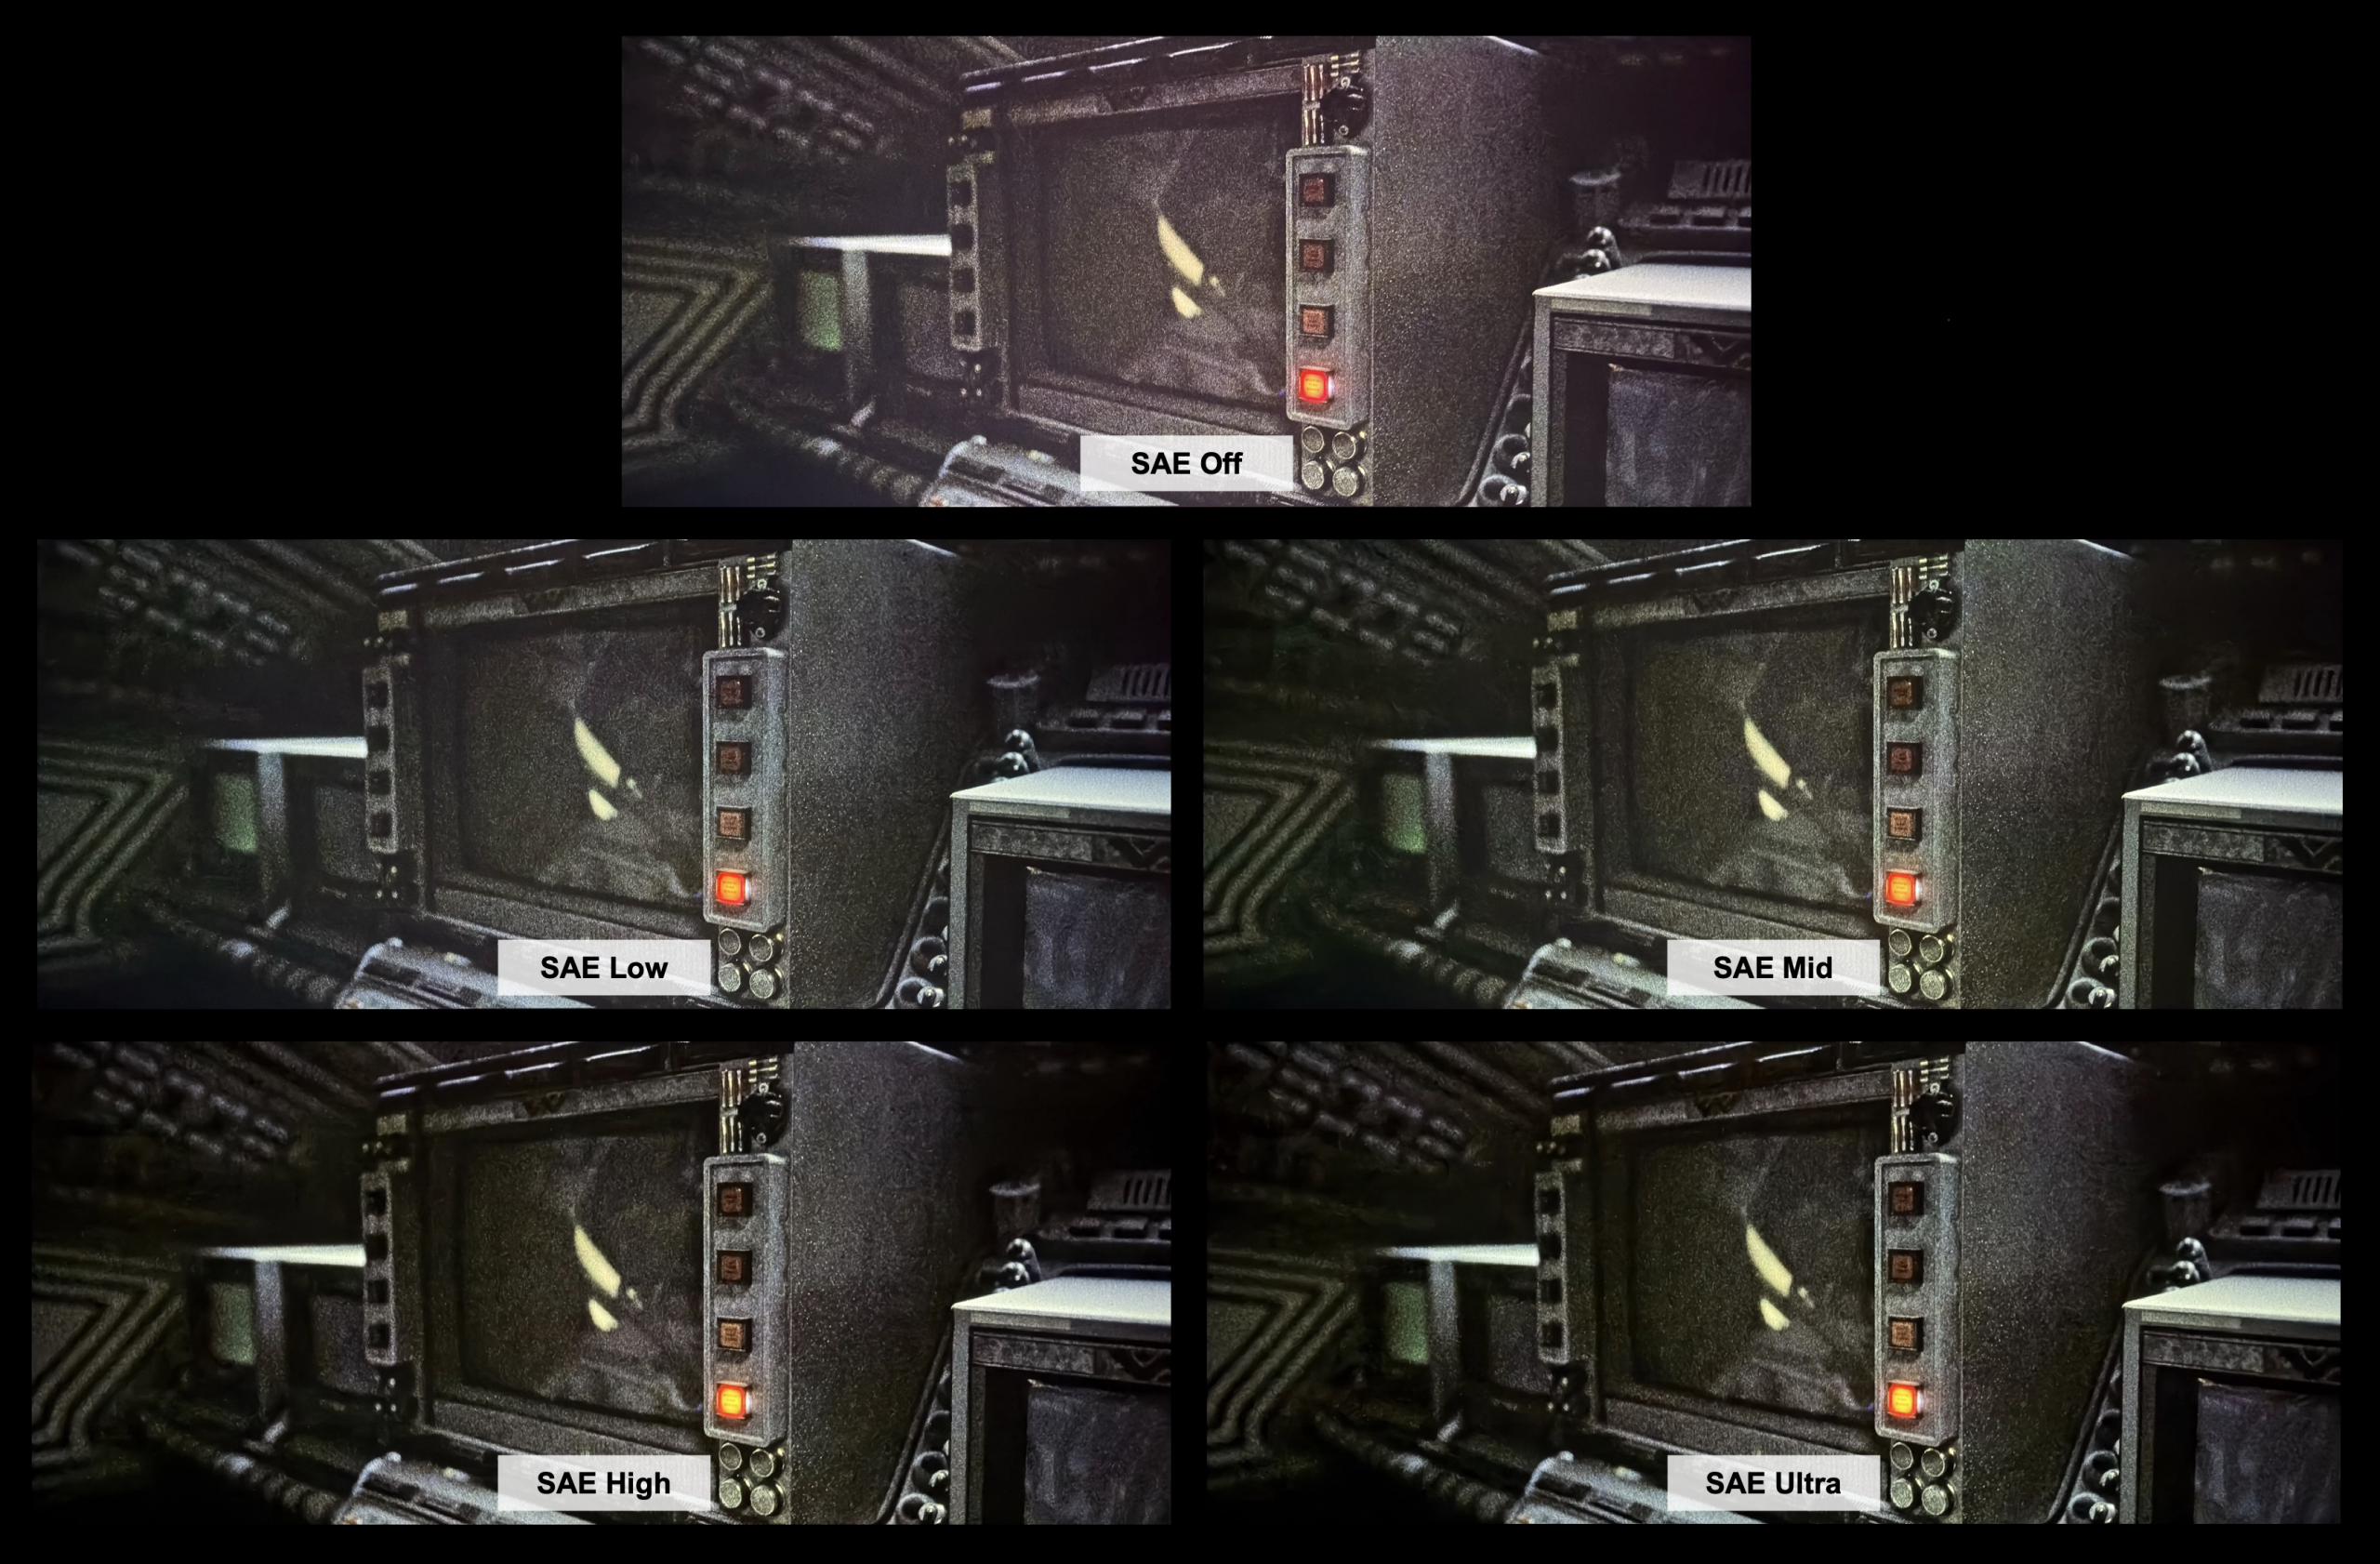
On top of the iris modes Nexigo offers four “Status” levels, which are the aggressiveness levels of the dynamic contrast algorithm. There is Low, Mid, High and Ultra. Low and Mid are rather mild and typically do not cause much clipping, if at all. If you want to make sure you are seeing highlights without loss of detail, I recommend using one of these modes. My preferred mode, after getting the most recent update, has surprisingly been High. I found that Nexigo has made this mode clip highlight detail only in smaller areas like light bulbs, or other small bright objects. While it does clip, and I’m traditionally a clip-free fan, the perceived depth that is added is hard to give up, and the clipping is quite minimal. Ultra, on the other hand, is a black levels at all costs option. You will get some of the darkest blacks on any projector but you will pay for it in heavy highlight clipping. Bright objects turn into blobs of light and the worst artifact of all occurs: clipping on faces.
How black does SAE get?
Black. Like I said, Ultra will get you some of the blackest blacks on a projector. Am I saying it comes close to JVC? Yes, that is exactly what I’m saying. It 100% matches my JVC NZ500 in black level on a lot of scenes. Not all scenes, but a lot of them. The Aurora Pro MK II, when set to SAE Ultra, performs as well as the NZ500 on the most demanding torture test scenes for a projector. But, like I said, this comes at a cost and that cost is highlight detail.
Is there a catch?
Nexigo’s Scene Adapt Engine pushes the boundaries of dynamic contrast. Seeing this projector achieve a dynamic contrast ratio of around 26,000:1 might lead you to believe it’s comparable to native contrast, especially considering its ability to compete with my JVC NZ500. However, this is not the case. A significant, yet often overlooked, compromise lies hidden within such dynamic contrast algorithms: compression. When a projector has to lower the black floor by dropping light output, it must adjust the gamma of the rest of the image to maintain midtones. This must be done to preserve the overall tonality of the image. What happens is these midtones are now closer in brightness to the image’s highlights. The result is less depth, or contrast, between the midtones and highlights. This compression in the image can make the image appear flat and muted, even with the deeper black levels. With something like the NZ500 you got not only the black levels, but also the highlights, and with zero artifacts to get both.
But…
Nexigo has done great work with their Scene Adapt Engine and with it set to Iris Lite and High I was continually impressed with the black levels I was seeing. In one of my favorite scenes to test black level performance, The Expanse Season 3, Episode 10 at around 15 minutes, there is a spaceship fight scene where there’s deep starfield scenes, fast movement, spaceships that cut in and out, and bright explosions. These explosions and the bright spaceship engine exhaust are prone to be clipped with dynamic contrast systems. I only saw subtle clipping and the brightness changes happened in line with the content, making them nearly unnoticeable. I was honestly surprised when I put my JVC NZ500 up next to the AP MKII in this scene. Yes, the NZ500 had brighter highlights, and the indoor shots with larger bright lights and reflections looked better on the NZ500, but the AP MKII held its own and even matched the NZ500 on a lot of the starfields. This was very impressive and should not be understated. A 3500:1 projector was throwing blows on starfields with my 25,000:1 projector that is more than twice the price.
SAE still has some flaws that I’d like to see Nexigo address. Occasionally, I observe a brightness jump a few frames before a scene change, suggesting the algorithm increases the laser or adjusts the gamma too hastily. There is also still some flickering and brightness jumps here and there which can really detract from the experience. Clipping used to be a significant issue here that I’d mention but Nexigo has really tuned SAE well over the past year.
SDR
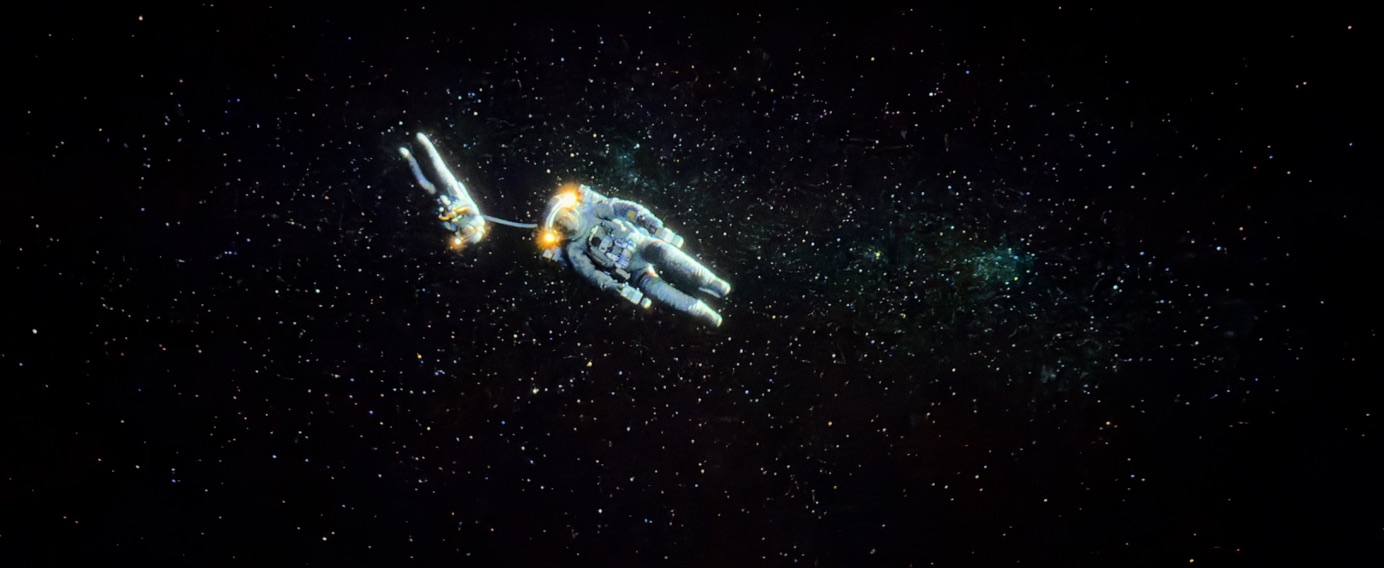
The AP MKII excels at displaying SDR content. For instance, the opening 15 minutes of Gravity, which feature scenes of very high contrast with bright whites and deep blacks, is an excellent test for any projector’s contrast capabilities. The AP MKII handled this movie very well. Using my preferred settings of SAE mode, Iris Lite, and SAE High, the scene where Astronaut Stone drifts off into deep space was rendered effectively. While there was slight clipping, the black levels remained very deep, and the stars were not crushed, or the black level too high for the stars to be visible.
I revisited an old movie i, Robot from my collection. This older film, shot over 20 years ago, showcases a different aesthetic than modern movies, with richer shadows and greater scene depth, making shadow detail and in-scene contrast vital. The MKII delivered excellent richness, depth, and color with the 1080p source, which appeared notably close to many 4K presentations.
I threw on some sports streaming from Peacock to my Apple TV to see how the AP MKII handled mediocre quality fast action. I was pretty disappointed here. The MKII had a strong tendency to clip and add some yellowness to very bright areas like the floors on a basketball court, and even some faces of the broadcasters. I did notice some of this odd coloration to highlights while testing the contrast plunge pattern but it rarely came up with movie or TV content. I could reduce contrast to 44 and get rid of the coloration in the highlights but this of course reduces brightness. This is what I ended up needing to do to enjoy the games. High quality sports, like the Olympics streaming in HDR on Peacock, looked very good with no complaints.
HDR
Season 2 of Hijack is a show that seems to be made for HDR. The creators of the show seem to find a way to get a bright LED lightbar, indicator, sunlight, spotlight, or some other bright object into every scene. I’m not complaining! On my LG C5 OLED it is visually stunning. There are deep underground subway scenes with very bright highlights. I started watching it on the OLED, moved to my JVC and then onto the AP MKII. I expected the AP MKII to take a large step back in being able to reproduce the dark scenes that the JVC was able to, let alone the OLED. I’m not going to tell you the AP MKII could match the OLED, the JVC didn’t even come close, but the AP MKII definitely held its own better than I would have expected from a DLP anywhere near its price point! The shadow details in the dark subway came through and the image depth produced kept me engaged. The bright highlights of the LED bars and anything else the director could find that was shiny were duller to give the convincing HDR effect the JVC and OLED were able to achieve. Bright scenes with highlights looked great, it was just these dark scenes that lacked the punch the scene required. Overall, the AP MKII does well with this show and it is an enjoyable watch.
Watching Spider-Man: Into the Spider-Verse on the AP MKII was a visual treat. This movie has a healthy amount of P3 gamut coverage, and these colors looked excellent. I always appreciate the deep reds a wide gamut display can produce, and the MKII did not disappoint here. I like this movie a lot but the way it was made the 24hz motion has a bit too much stutter for my liking. This gave me an opportunity to test the MEMC (Motion Enhancement Motion Compensation) features on the MKII. I only ever like a mild frame interpolation, where only some frames are added to smooth out the choppiness of 24hz. The clarity and in-scene contrast of the DLP image thrown by the AP MKII, sprinkled with a little motion interpolation left me watching this movie longer than I intended!
One of my favorite test scenes for dark content is a small sequence from The Expanse in Season 5, Episode 10. The scene comprises of multiple space ships fighting each other in deep space with fast moving rockets, turret guns, and cuts to interior scenes with bright specular details. It is a difficult scene for any type of dynamic contrast, from local dimming on TVs to laser dimming on projectors. The fast-paced motion and quick brightening of highlights can cause all sorts of artifacts on a projector – clipping, brightness jumps, and flickering. Watching this scene on the MKII left me audibly saying one word: wow. I was left thinking I was watching my JVC NZ500, not a DLP. SAE handled the transitions masterfully with laser brightness adjustments happening perfectly in sync with the scene so the raise in black level was hardly noticeable. The only clipping I noticed was with small bright explosions which would likely go unnoticed to many. The blue plume from the spacecraft’s engines were not clipped at all. This is a large improvement from early firmware where they were clipped. Overall, the black levels of deep space and detail of the stars were captivating with incredible depth. Just amazing coming from a DLP with a native contrast ratio of 3500:1. Again, wow.


Gaming
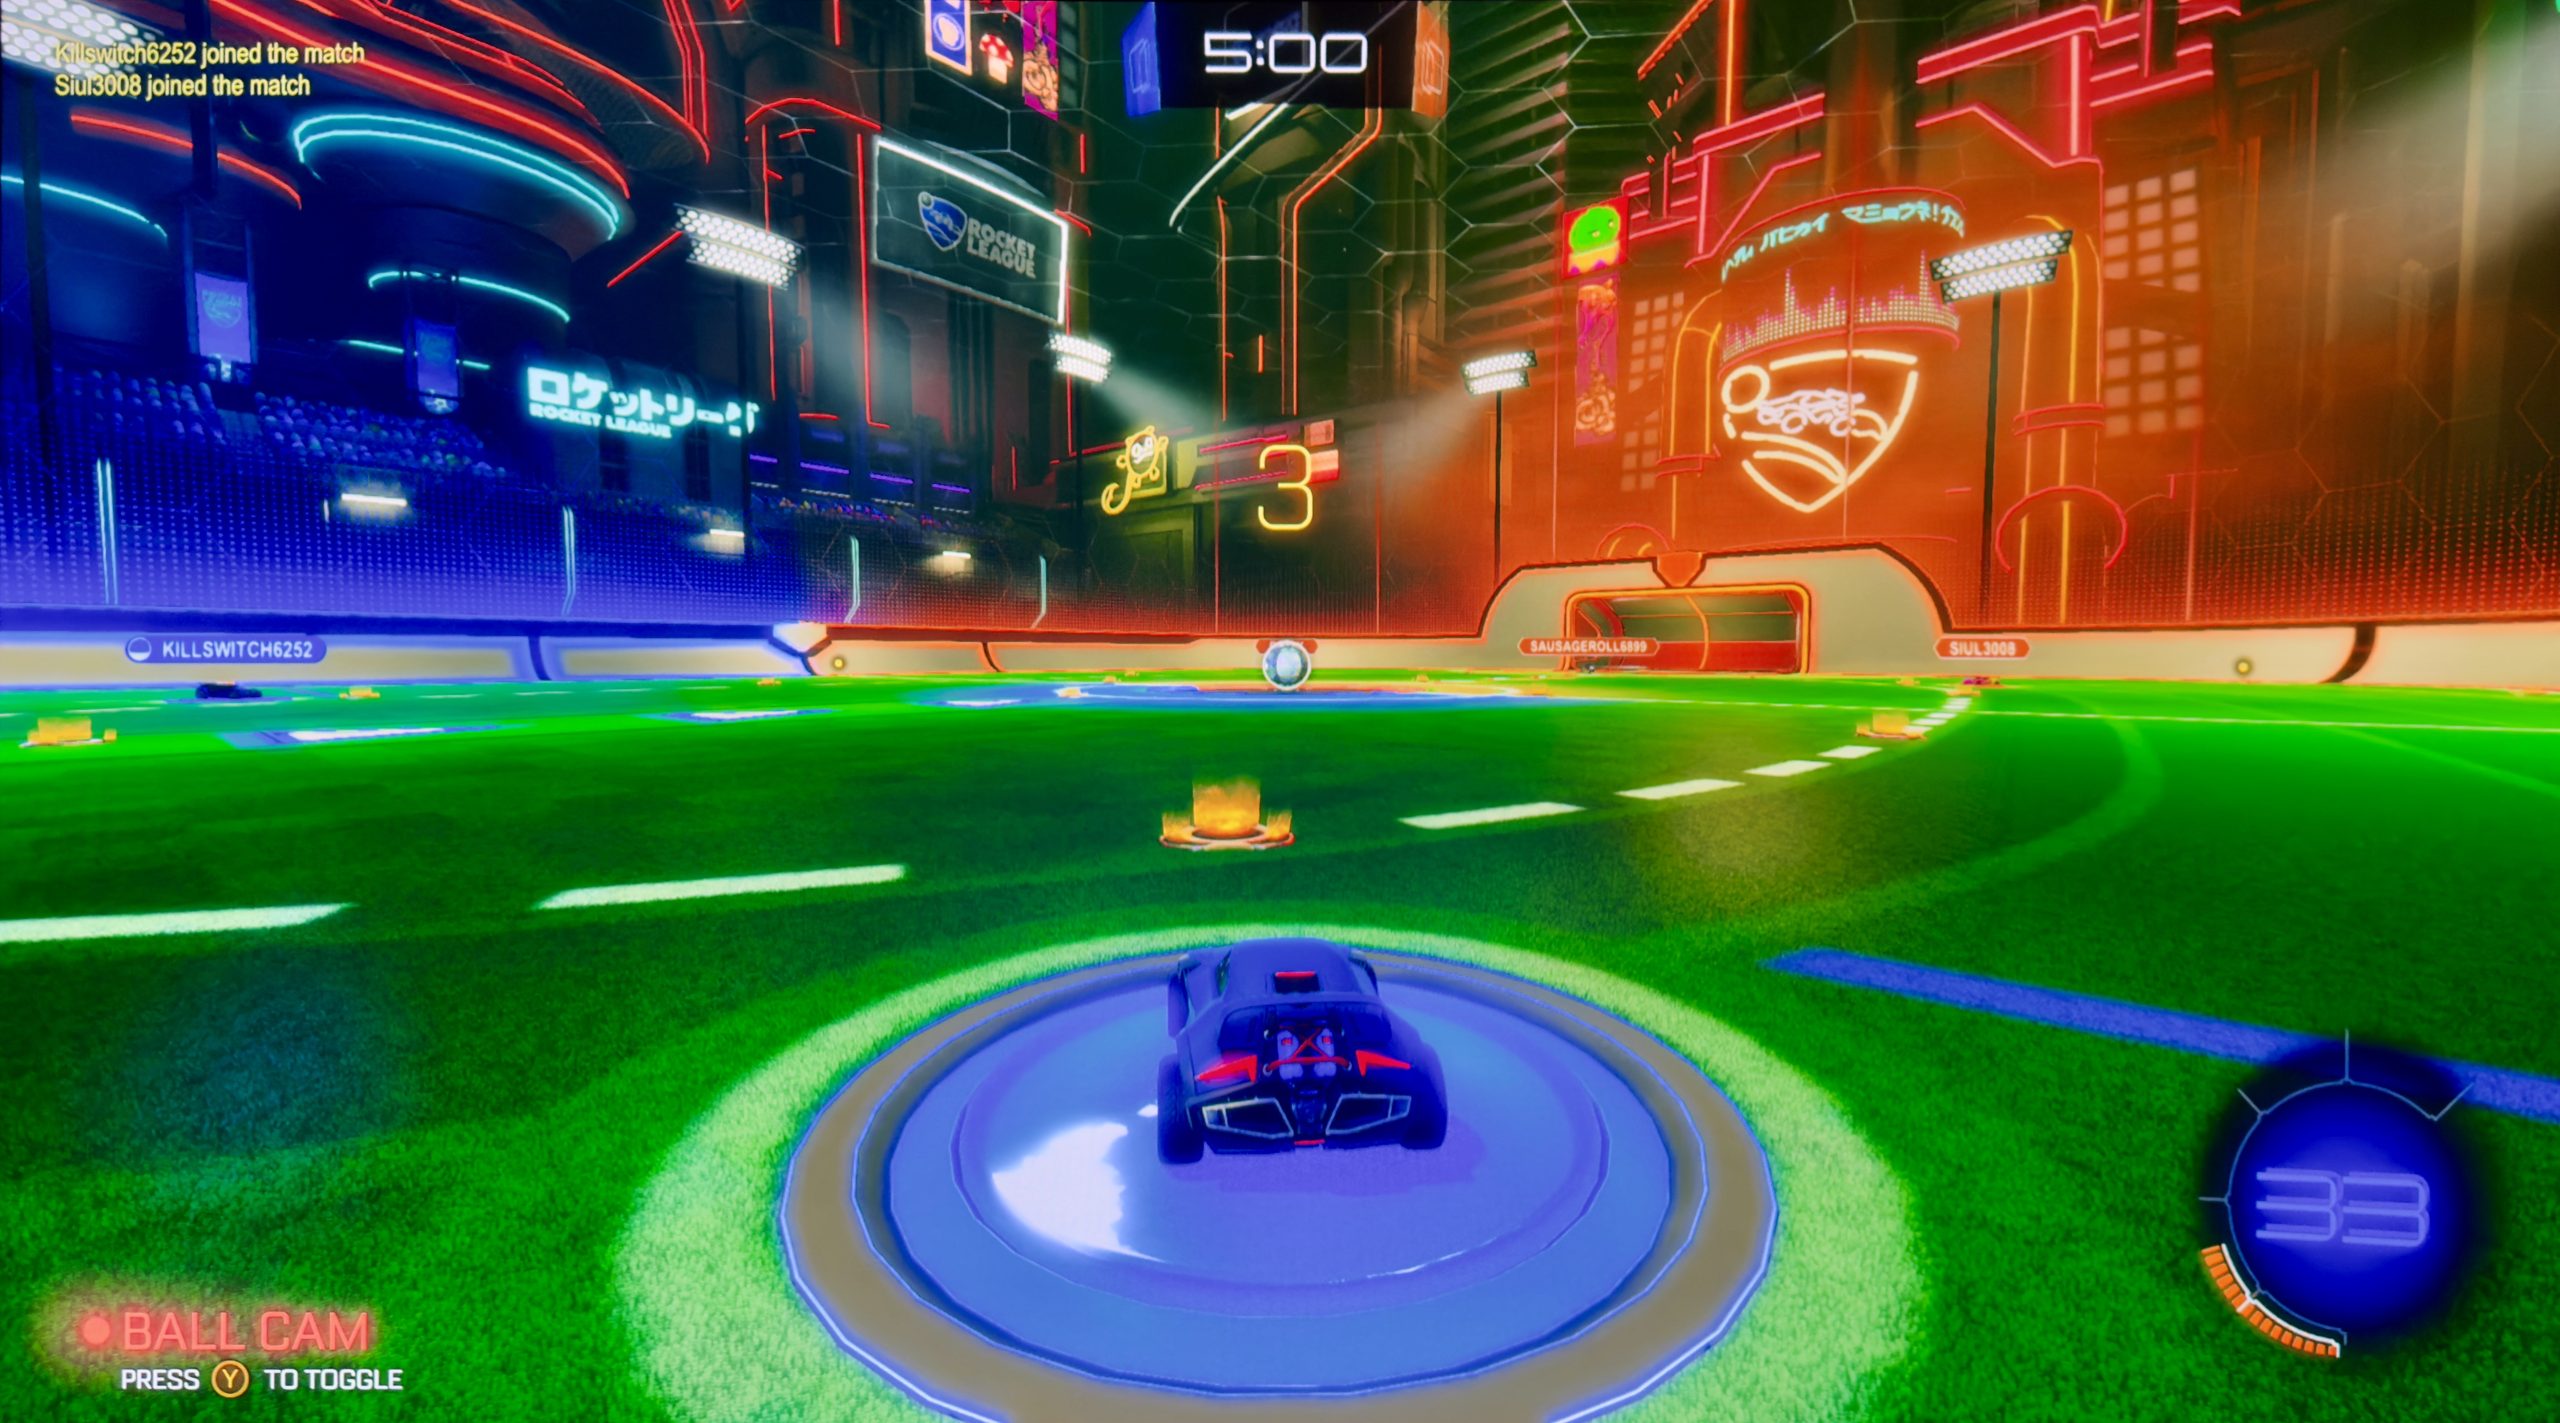
Since I lack the equipment to test input latency directly, I relied on playing video games, specifically, my long-time favorite, Rocket League, for testing. To achieve the lowest latency, you must activate the Gaming picture mode and enable Low Latency. Be aware that Low Latency mode disables keystone correction. The MKII does not feature an Auto Low Latency Mode.
I tested the impact of leaving the SAE on and found that it added very little, if any, detectable lag. Nexigo confirmed that while SAE can introduce some lag, it was honestly imperceptible during my testing.
Although I can’t provide specific numerical data, my experience playing Rocket League on the MKII was highly enjoyable, and I didn’t notice any input lag that would negatively affect my performance. I also appreciated the vivid color saturation. Because Rocket League is a purely digital game without the need for accurate skin tones, boosting the saturation made the vibrant colors truly pop off the screen.
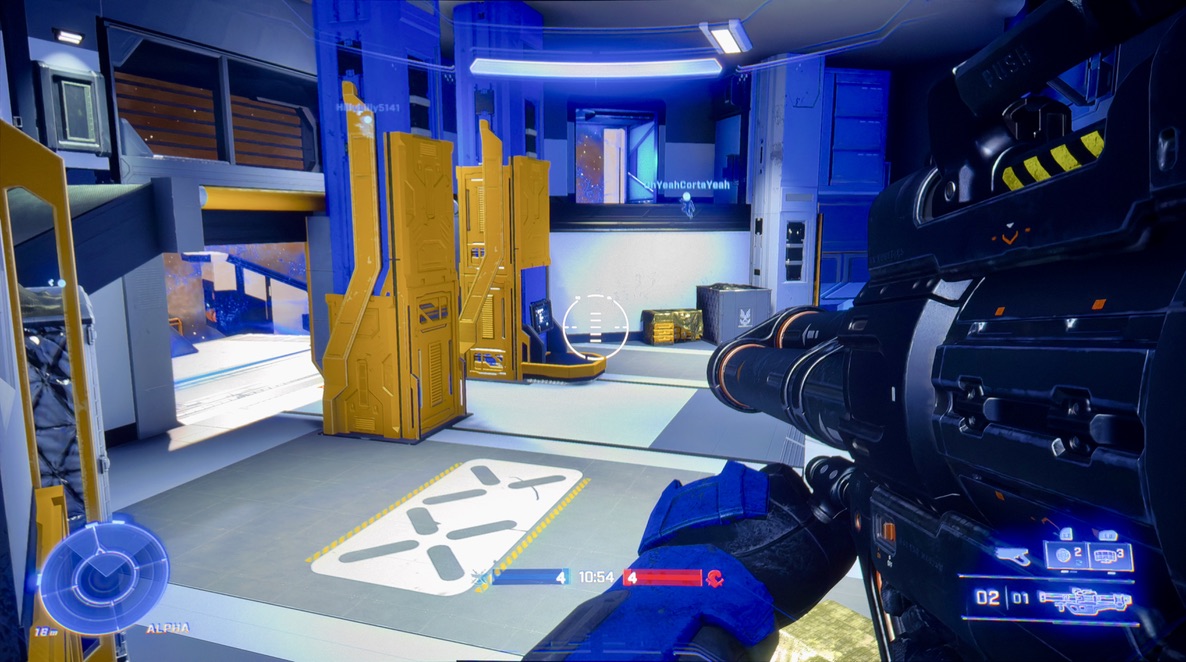
On top of testing Rocket League, I tested Halo Infinite, another long-time favorite franchise of mine. These are two games I typically rely on for lag testing as they are quick-twitch experiences that require low input lag or you’ll get left in the dust. I gotta say my Halo skills are more akin to riding a bike than Rocket League. I routinely had a positive kill-to-death ratio playing online and never felt like I was a step behind. Again, just like Rocket League, I didn’t notice an increase in lag with SAE but to be honest, neither of these games got tremendously dark enough that I felt like I needed more than what the native contrast on the AP MKII offers.
Overall, I was very pleased with the gaming performance of the AP MKII. I only played at 60hz and the instantaneous pixel response of DLP led to zero pixel blur. The increased color gamut of the AP MKII was also appreciated with games that can take advantage of it, even artificially by boosting the saturation control. I would heartily recommend the AP MKII for gaming.
Bugs
Noise Reduction/Blurred Shadow Detail
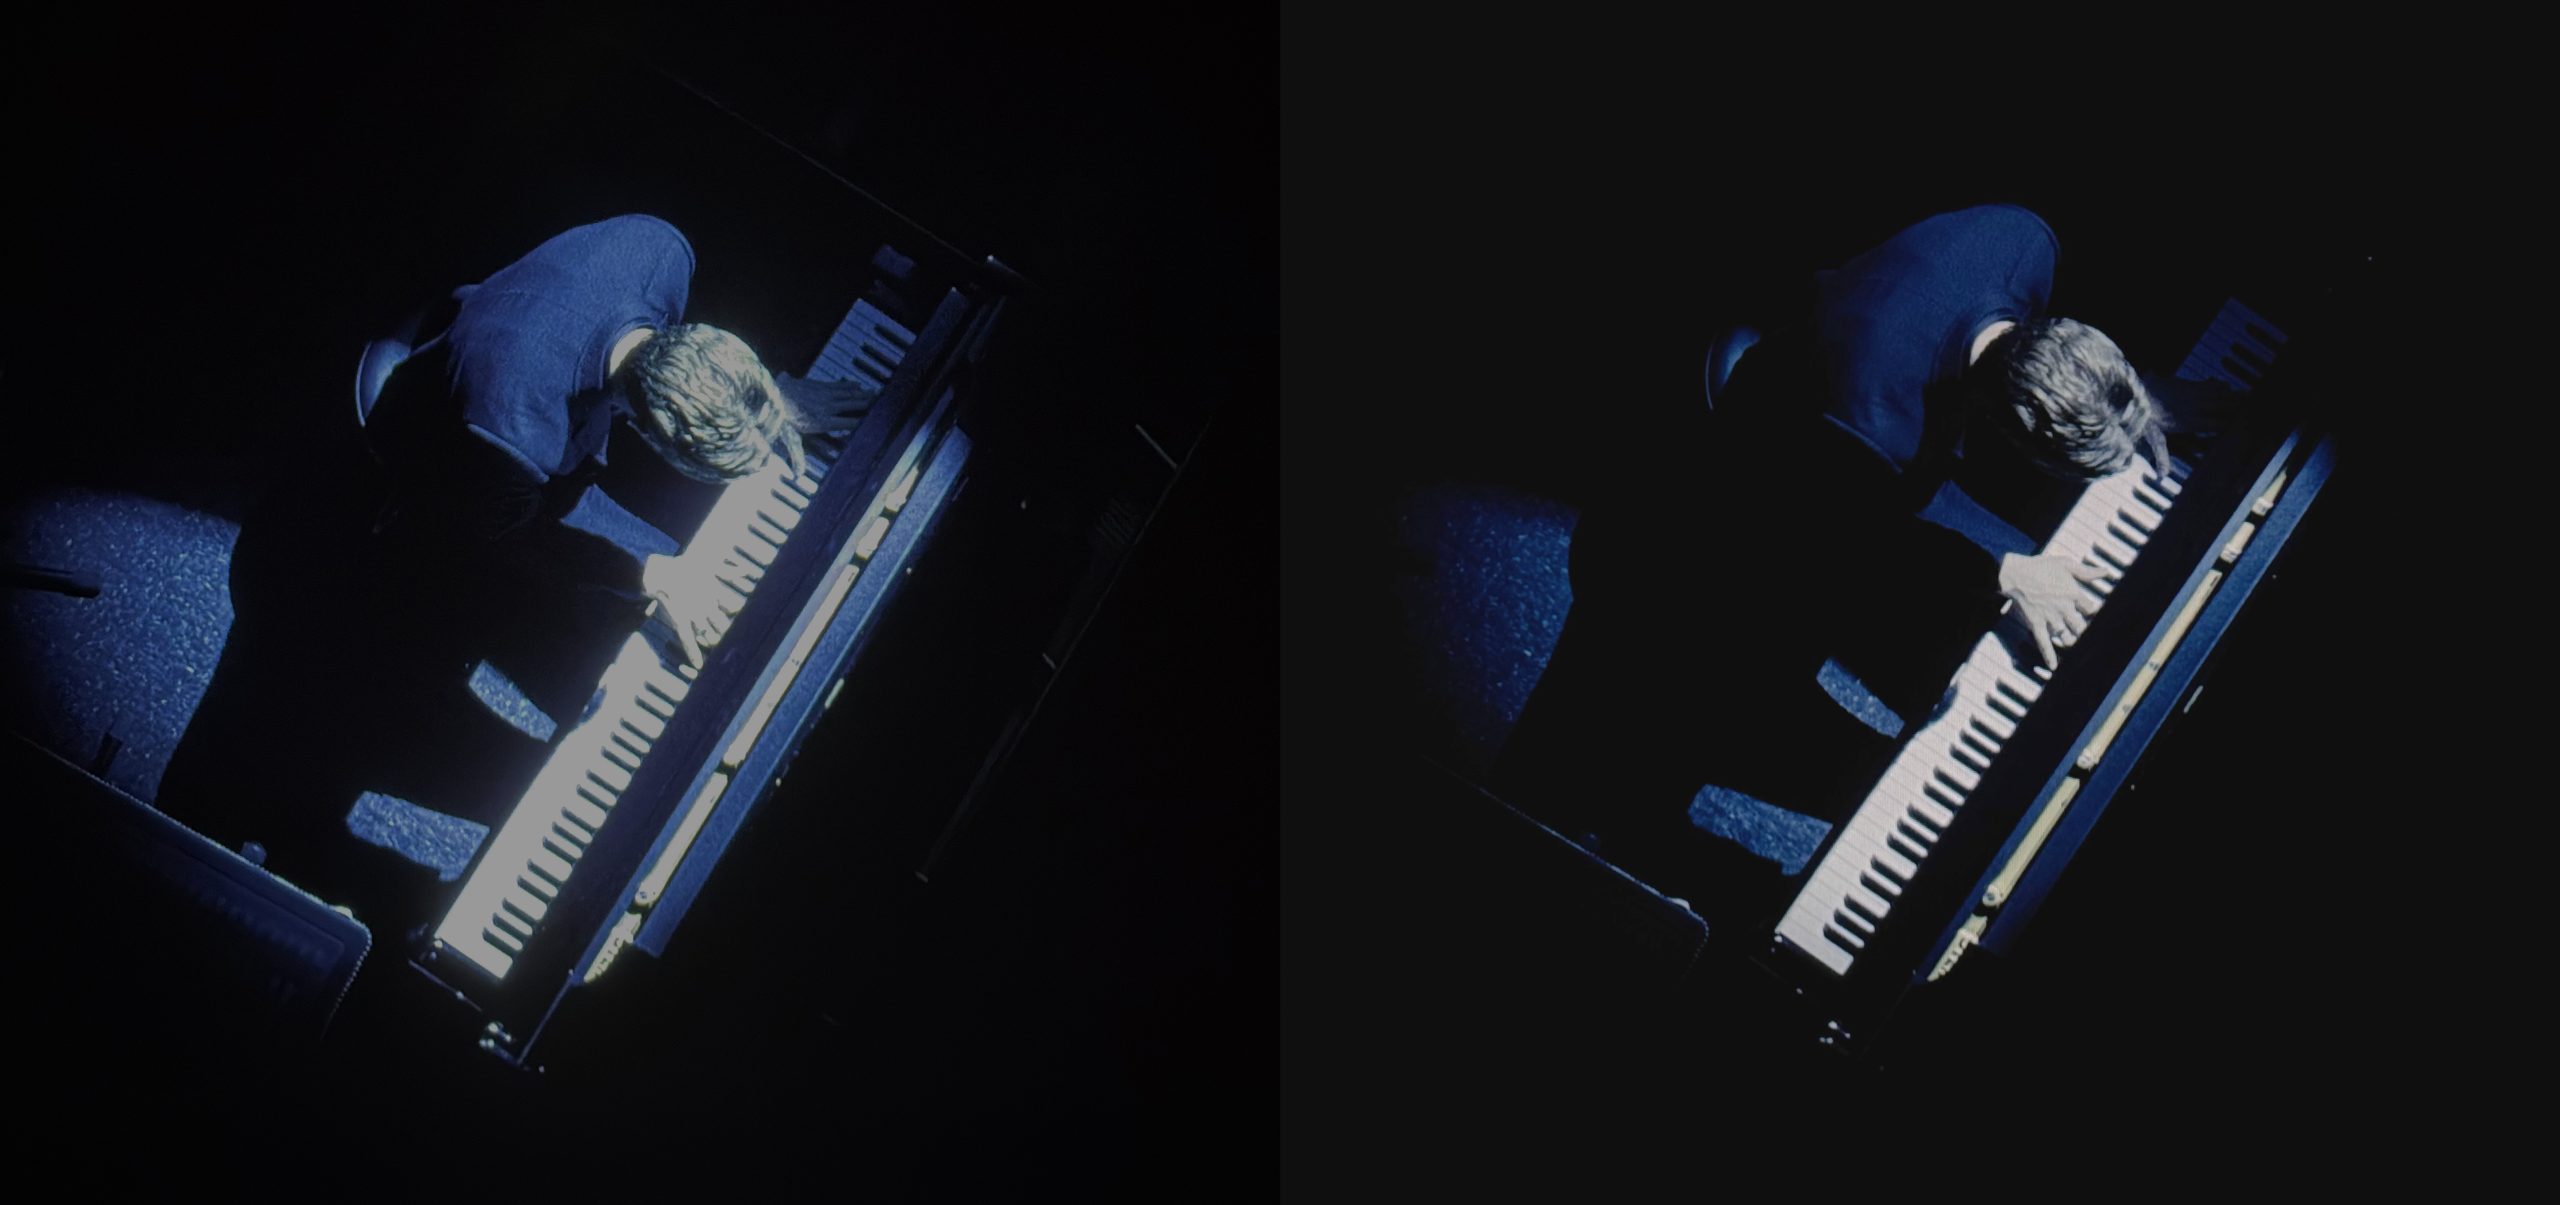
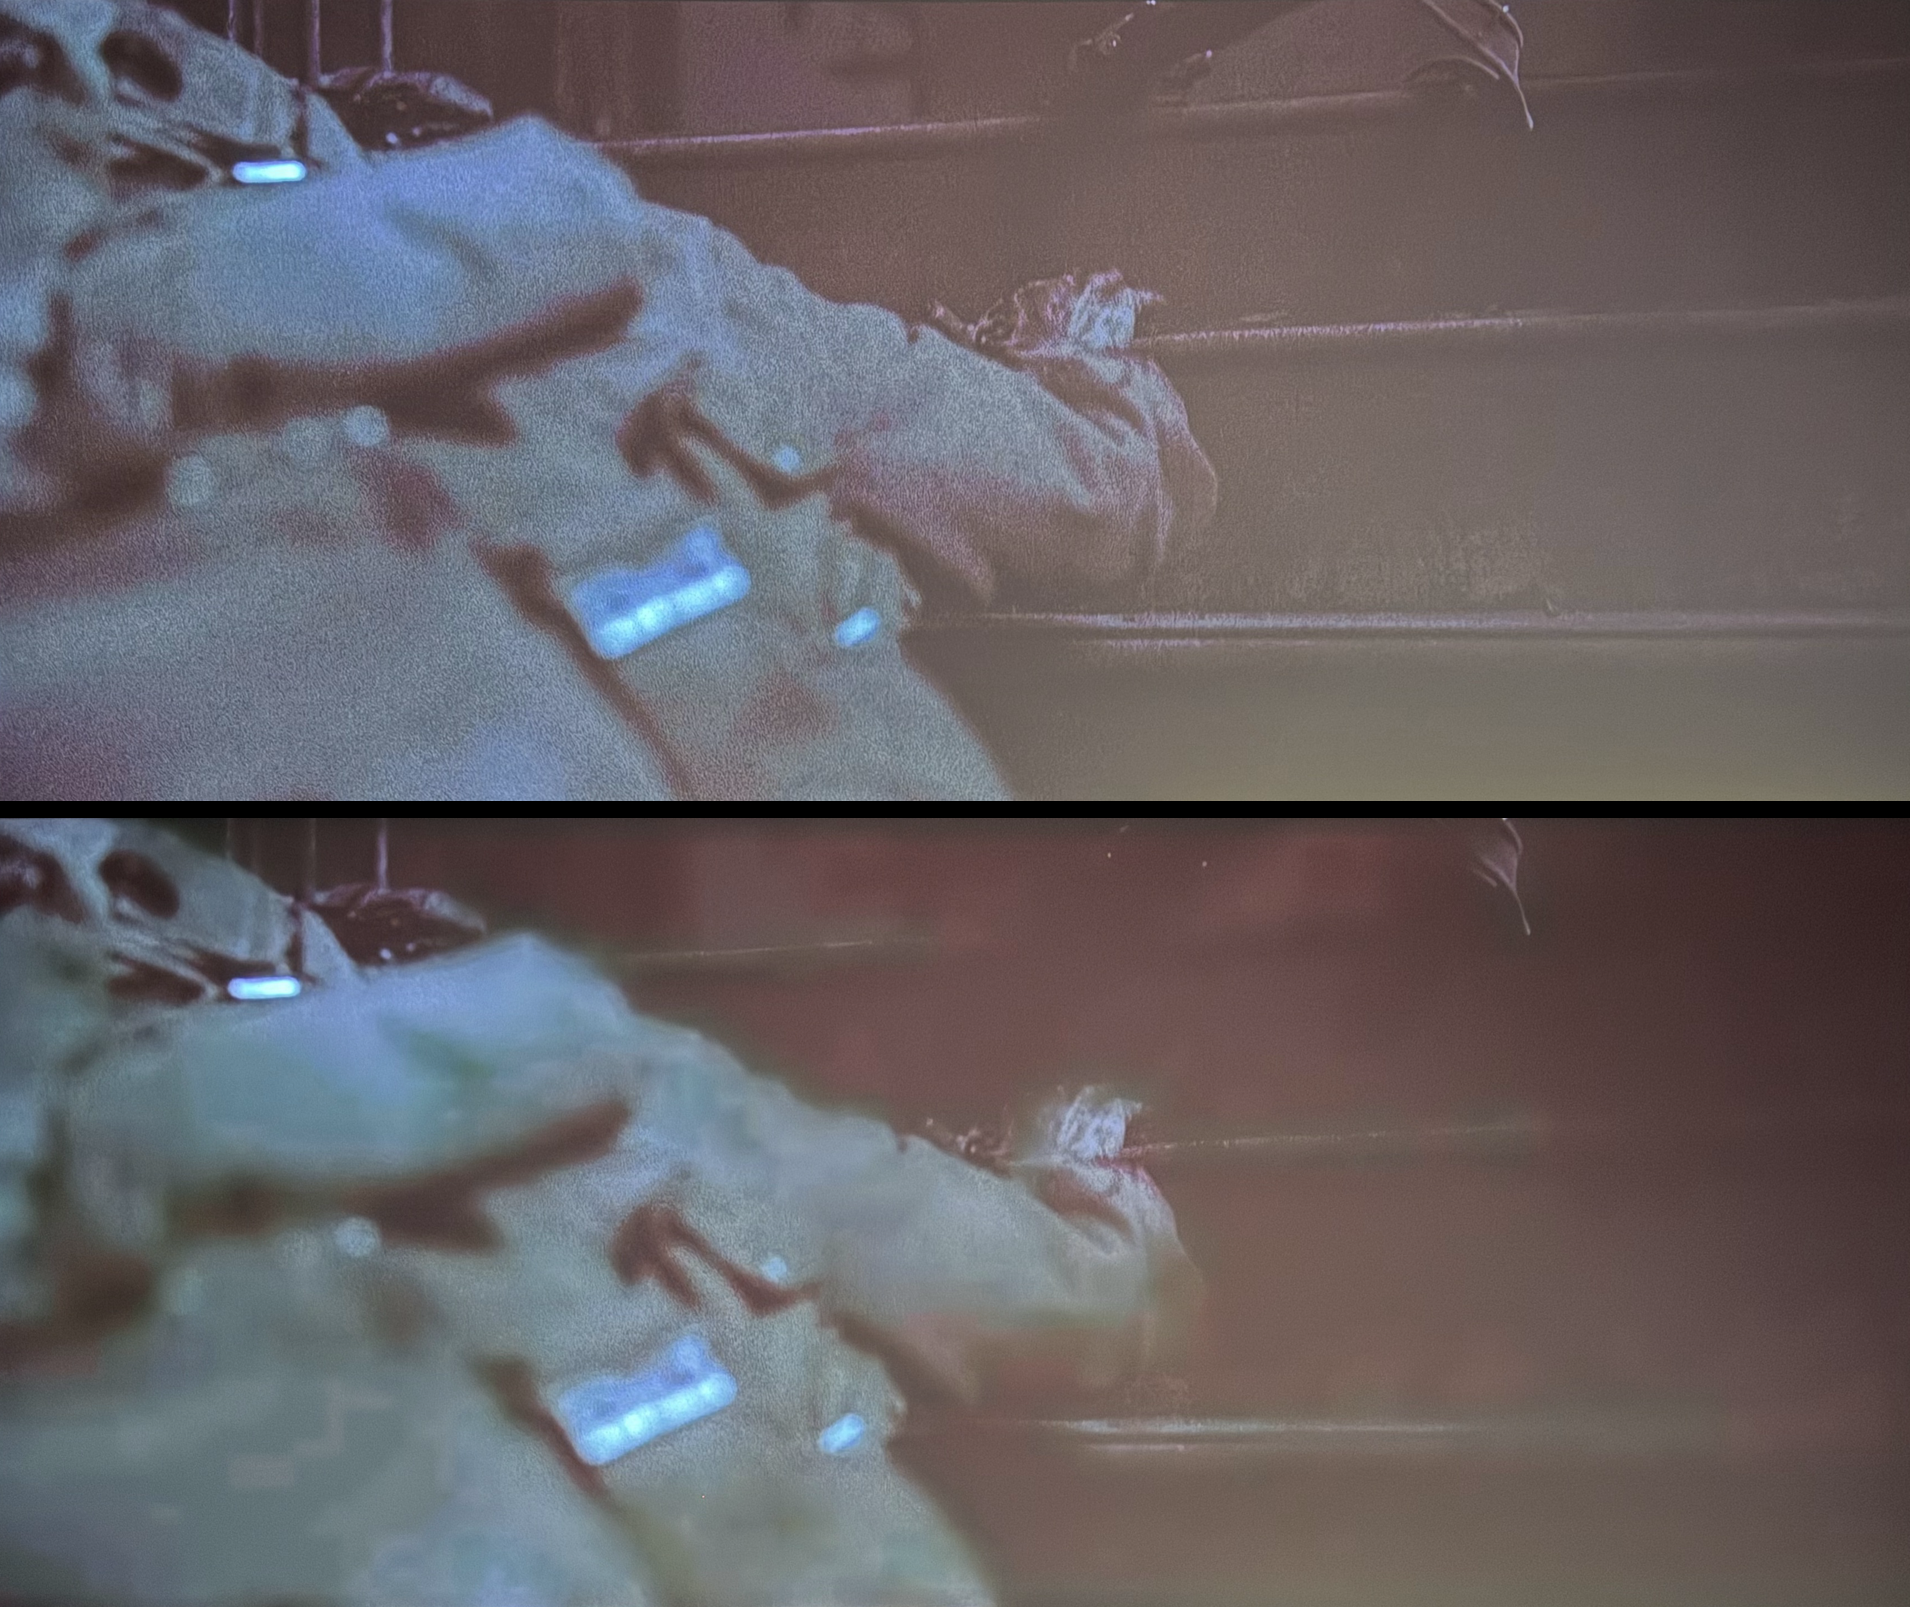
The biggest issue the MKII currently has is what appears to be some heavy noise reduction that can’t be turned off. I am not sure if it is actually a noise reduction bug or something else entirely. I have brought the issue up with Nexigo directly and they are aware of it. They believe it is a bug with the MediaTek chipset they use and to be fair to Nexigo, I have seen this issue on another projector – the Nebula X1, albeit not as bad. How it presents itself is in large areas of near black shadow detail the details will be smeared or blurred together. This is most obvious in something like the staircase scene in 1917, as seen below. I played 1917 on my PC and noticed when a bright window was open the shadow detail came back. So the top image here is with a large area in the bottom corner of the window lit up with a white dialog, the bottom image is with that dialog mostly off the screen. This means scenes with enough bright content will not show this issue.
Banding (mostly fixed!)
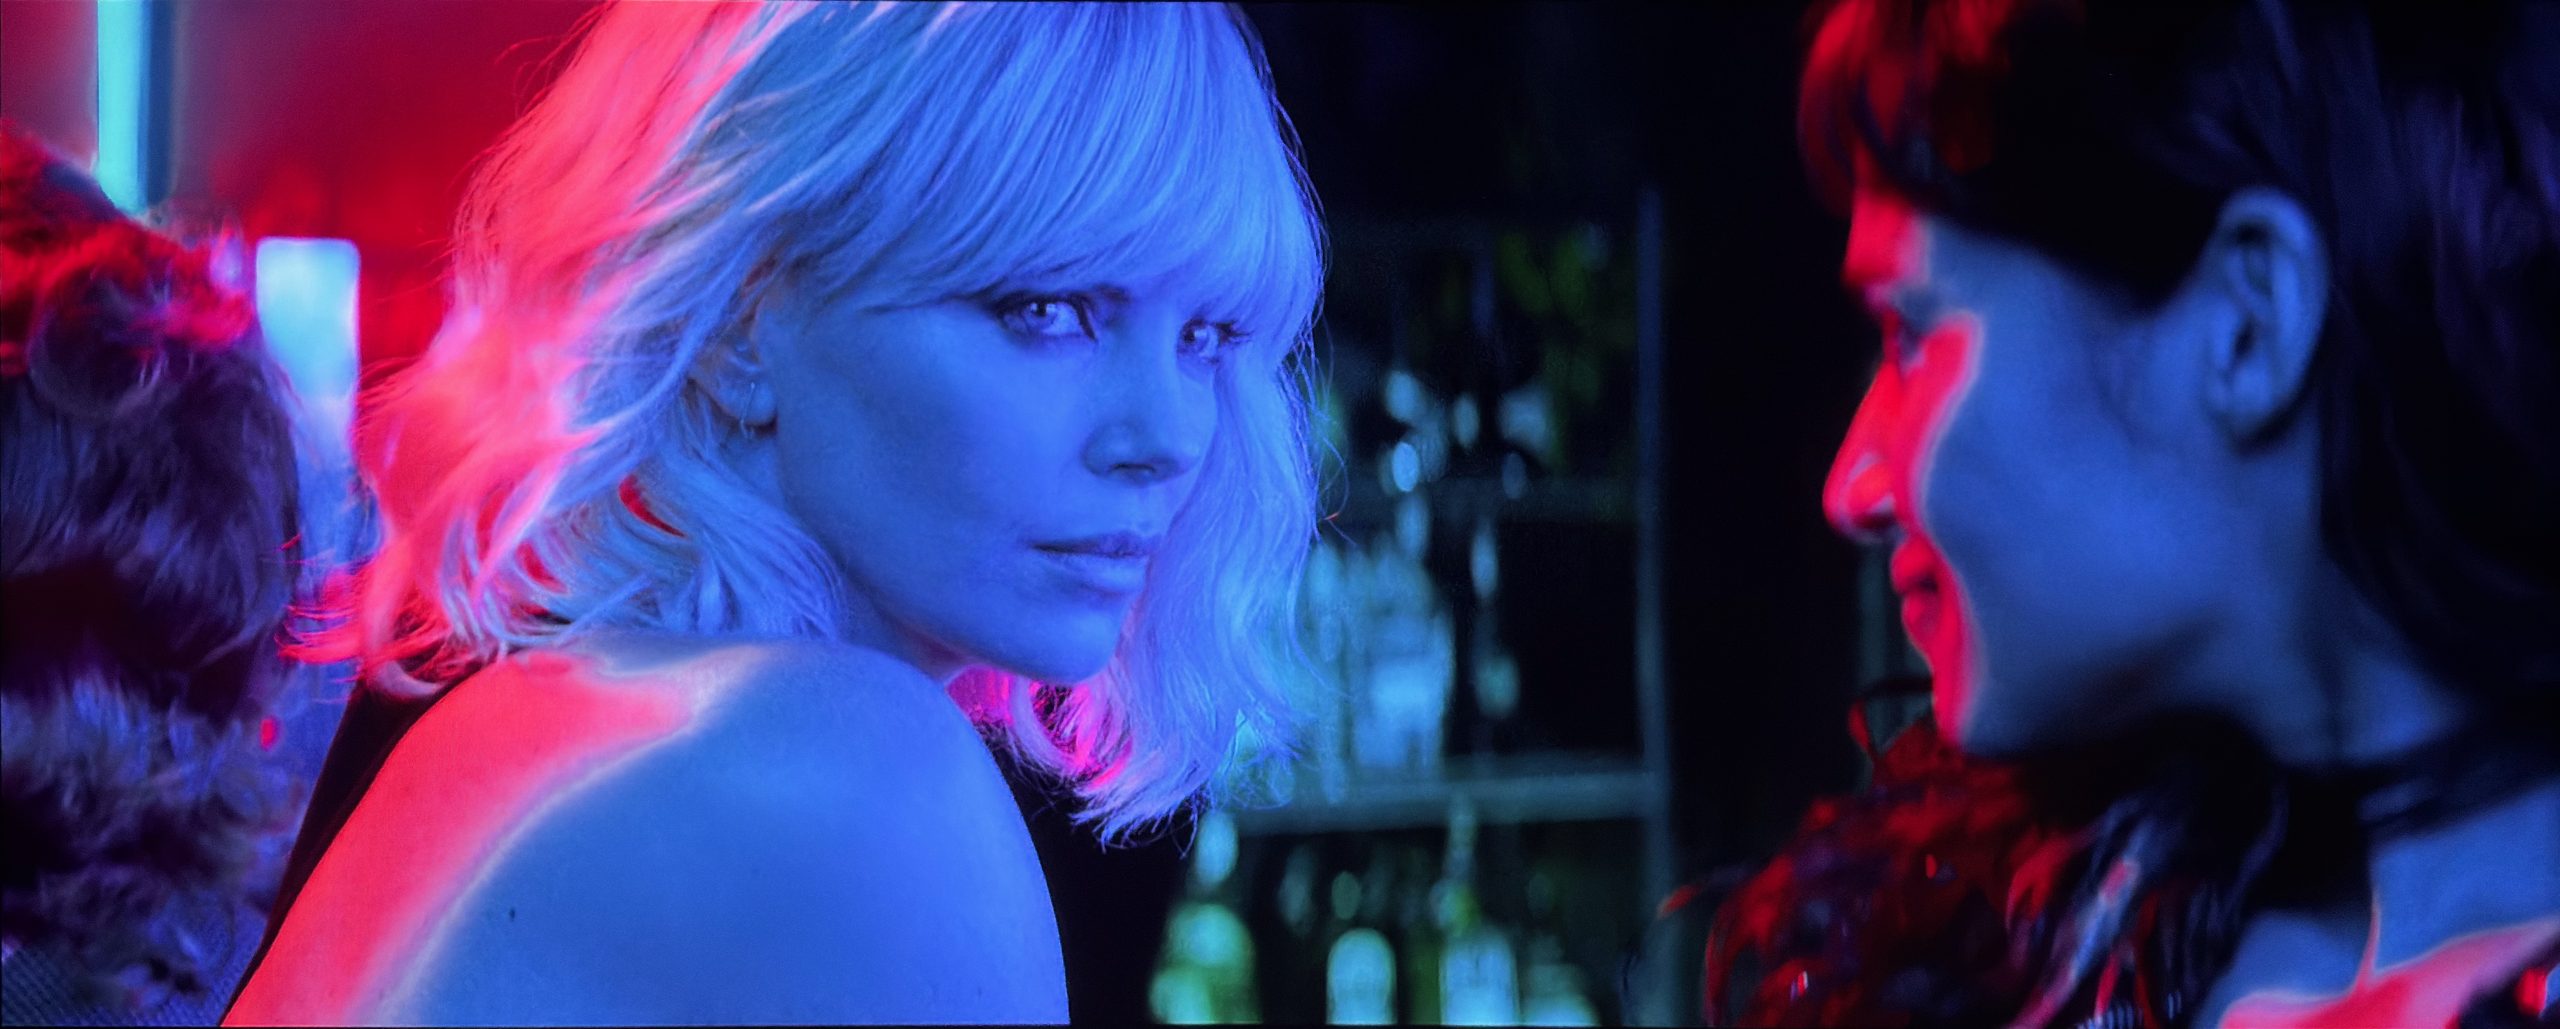
The MKII has had a rather mysterious banding issue that has plagued it for most of it’s life cycle. In the past few updates, Nexigo has made some large strides in reducing this issue. It is not a typical low bit depth gradation error that one may think of with banding. It has typically been the most obvious when SAE makes adjustments to the image. A lot of these errors have been remedied and they are either completely gone or will be very hard to notice for a lot of viewers. The remaining easily visible issue is banding in hard transitions from heavily saturated colors. The photo below is an example from Atomic Blonde where the hard transition from deep red does not fall off gradually as it should. Scenes like this aren’t very prevalent so it isn’t a large issue but is something that should be called out.
Conclusion
The Nexigo Aurora Pro MKII does something I haven’t seen another DLP under $50k do, it goes head to head with my JVC NZ500 in the darkest of scenes. The Scene Adapt Engine has evolved in the year since it was announced and is now in a state that I find very impressive. Not only because of the image it produces but because of the love and care that Nexigo put into it. If you are chasing a cinematic projector with deep blacks, wide color gamut, and low laser speckle then I can’t think of any other projector to choose. The AP MKII is not the brightest UST out there, but what it lacks in brightness it makes up for in contrast.
My reservations with the AP MKII come down to refinement. I would not call the AP MKII a reference projector due to the struggles I had with calibration. Too many controls are unpredictable and unrefined. On top of that the out of the box picture modes aren’t dialed in like I would prefer. It really means that if you are looking to get the best out of this projector you will need to spend a good amount of time tweaking it, or paying for a calibration. Aside from calibration issues, I’d like to see less image artifacts with and without SAE. The banding in heavily saturated gradients, occasional flicker from SAE, blurred shadow detail, and yellow shifted clipping in low quality content can really distract from the image when they come up.
Even with my reservations, I find the AP MKII easily worth the asking price, and more. If you ask me, contrast is the most important part of the image and that is where the AP MKII excels. You can make up for a lot of misgivings if the image has plenty of contrast and excellent black levels. I’m sitting here finishing up this review while having Blade Runner 2049 on in the background, playing on the AP MKII. Every time I glance up at just the hint of a dark scene I am impressed by the black levels and depth of the image.
I don’t have enough reviews under my belt to really have projector categories, but I can’t see any way the Nexigo Aurora Pro MKII wouldn’t get a Highly Recommended Award. At $3499.99, and regularly on sale below $3000, I believe the AP MKII is a great value.
Measurements
Lumens
I have yet to find a method for measuring lumens on a UST that I am happy with and find accurate. If I measure with my luminance meter laying flat on my screen I can get consistent measurements but they seem low. This method does match the ISO 21118 standard with the meter positioned perpendicular to the viewing axis. The issue with ISO lumens is that lenticular and fresnel screens have angled ridges that direct the light at the viewer which measuring this way doesn’t account for. When I use my Sper Scientific luminance meter angled to account for this I get wildly inaccurate readings where the measurements are larger the further I get from the projector.
Below I am reporting ISO lumens. I can consistently measure each UST this way so until I figure out a way to measure in a way that better accounts for UST specific screens, this will have to do. These measurements will likely be low relative to ratings but will be representative of what you’d see with a flat screen.
| Mode | Lumens |
|---|---|
| Brightest | 1826 |
| Calibrated | 1407 |
Contrast
ADL contrast with the MKII in it’s Brightest mode with the color temperature set to Standard.
| ADL | Contrast |
|---|---|
| 0% | 3704:1 |
| 0.25% | 3591:1 |
| 0.5% | 3521:1 |
| 1 % | 3390:1 |
| 2 % | 3214:1 |
| 3% | 2886:1 |
| 4% | 2768:1 |
| 5% | 2624:1 |
| 10% | 2114:1 |
| 15% | 1781:1 |
| 20% | 1509:1 |
| 25% | 1357:1 |
| 30% | 1146:1 |
| 50% | 537:1 |
Here is ADL contrast as calibrated. Depending on your own perceptual white point this could be higher or lower.
A bit of an odd situation here. 25, 30, and 50% are higher vs uncalibrated. This is what I measured so I am reporting it. Either way, above 500:1 ANSI is very good.
| ADL | Contrast |
|---|---|
| 0% | 3278:1 |
| 0.25% | 3217:1 |
| 0.5% | 3168:1 |
| 1% | 3074:1 |
| 2% | 2945:1 |
| 3% | 2667:1 |
| 4% | 2584:1 |
| 5% | 2474:1 |
| 10% | 2056:1 |
| 15% | 1774:1 |
| 20% | 1526:1 |
| 25% | 1381:1 |
| 30% | 1183:1 |
| 50% | 580:1 |
Iris Impact
Iris Setting Impact on Brightness
| Level | Percent of Iris Off |
|---|---|
| Iris Off | 100% |
| Iris Bright | 97% |
| Iris Lite | 99% |
| Custom 0 | 71% |
| Custom -5 | 57% |
| Custom -10 | 49% |
| Custom -13 | 47% |
Dynamic Contrast – SAE Ultra
| Level | Contrast |
|---|---|
| Iris Bright | 26k:1 |
| Iris Lite | 26k:1 |
| Custom 0 | 18k:1 |
| Custom -5 | 15k:1 |
| Custom -10 | 12k:1 |
| Custom -13 | 11k:1 |
Dynamic Contrast – SAE High
| Level | Contrast |
|---|---|
| Iris Bright | 23k:1 |
| Iris Lite | 25k:1 |
| Custom 0 | 18k:1 |
Dynamic Contrast – SAE Mid
| Level | Contrast |
|---|---|
| Iris Bright | 22k:1 |
| Iris Lite | 23k:1 |
| Custom 0 | 18k:1 |
Dynamic Contrast – SAE Low
| Level | Contrast |
|---|---|
| Iris Bright | 22k:1 |
| Iris Lite | 23k:1 |
| Custom 0 | 12k:1 |
Iris Impact on 0.25% ADL
| Level | Contrast |
|---|---|
| Iris Bright | 3599:1 |
| Iris Lite | 3642:1 |
| Custom 0 | 3416:1 |
| Custom -5 | 3550:1 |
| Custom -10 | 3596:1 |
| Custom -13 | 3600:1 |
Leave a Reply